Real Easy Store enables you to create content pages as easily as you would create About Us pages.
Pages are for content that isn't specifically time-dependent, or which isn't "blog content". Here you can manage your custom pages in Real Easy Store, this page will be containing two sections, which are upper section and bottom section, let's explain each one:

Upper Section
You'll see in this section two filters options to filter your pages and new page button to create new page, let's explain each one:
- Activity Status Filter. This is the first filter from the left, to filter your pages based on the status, choose an option from this filter Active, Inactive, or Any.
- Publishing Status Filter. This is the second filter from the left, to filter your pages based on the publishing status, choose an option from this filter Public, User Only, or Any.
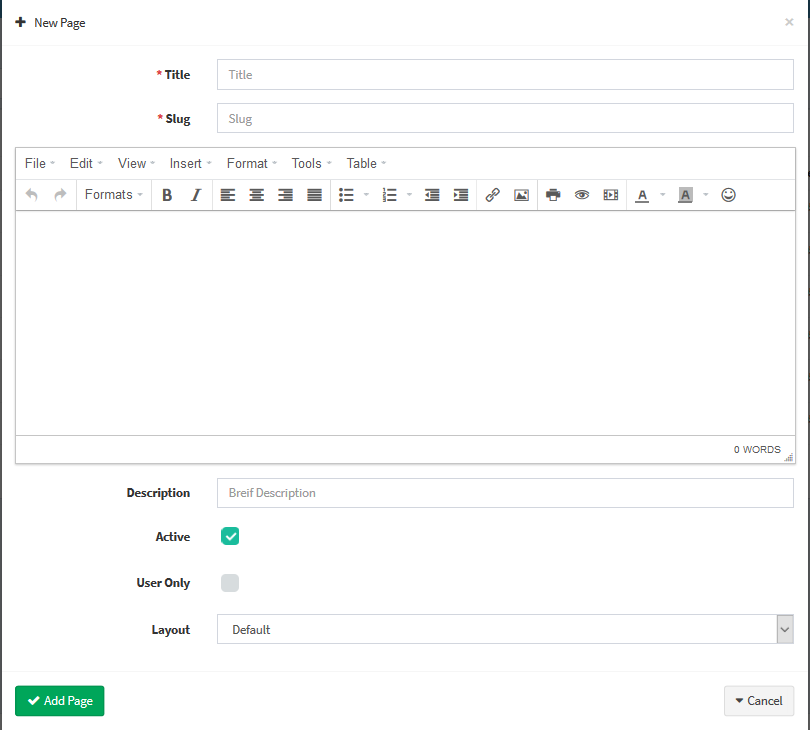
- New Page Button. This button will be in the right top corner of the page, click on this button to add a new page, when you click on this button, there's a modal will appear with multiple fields, let's explain each one:
- Title. The page title appears in the browser tab, type your page title here, and make sure that the title is related to your page content for a better user experience.
- Slug. Add your Page Slug, Slug is nothing more than a few words, which you choose, to describe your page. These words then appear as part of the URL (or Permalink) directing visitors to that content.
- Body Editor. Here you'll add your page content, you can add many type of content with our Body Editor. For example, you can add heading and paragraphs, media, and custom html code, etc.
- Description. Add your Page Description.
- Active. This is an option, check it if you want to set your new Page status as Active, uncheck it if you want to set your new Page status as Inactive.
- User Only. This is an option, check it if you want to set your new page status as User Only that only your website users can see the page.
- Layout. This select options to choose your page layout.
- Add Page Button. After you finish filling up your page information, click on this button to add the page to your site.

Bottom Section
You'll see in this section the made-before page table, with five columns, let's explain each column:
- Title column. Contain page title in this section.
- Slug column. Contain the page's slug in this column.
- Status column. Contain page's status with is active and user only in this column.
- Create column. Contain each page created date and time in this column.
- Update column. Contain each page last update date and time in this column.
- Edit Buttons column. Contain two buttons in this column, which are edit and delete, click on edit button to edit any page, and click on delete button to delete any page.
