Products page is where to manage, add, delete, and browse all of your website products in Real Easy Store. This page is one section, which about products browser with control buttons and folders space, let's explain each one:

Control Buttons
Control Buttons is the buttons to manage your products and move through them smoothly, which are Back, Up, Search, New Category, and New Product button, let's explain each button:
Back Button. This button just like back button in the windows file explorer, when you get in and out any folder, click on back button to take you to the last step/place you're in.
Up Button. Also this button just like up button in the windows file explorer, when you get in and out any folders, click on the up button to take you to the outer folder.
Search Button. Click on this button to search in your products and their categories, when you click on this button there's a modal will appear, with multiple fields and choices, let's explain this modal for a better advanced search experience:
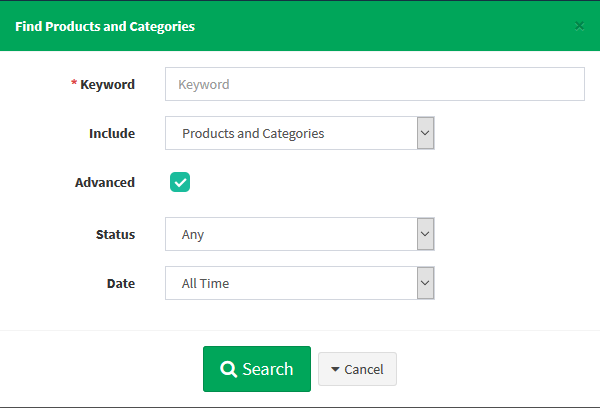
- Keyword. Add your keyword that you want to search for.
- Include. Choose where to search, you'll find three option which are, products and categories, products only, and categories only, choose one of them.
- Advanced. You can run advanced search, when you click on this option, there are other options will appear, let's explain each one:
- Status. Choose products status to search in, choose from Active, Inactive or Any.
- Date. You can also serch in the products that uploaded in a specefic dates, choose products upload date to search in, choose from All Time, Last 24 Hours, Last 7 Days, Last 30 Days, or Last 6 Months.
Search Button. After you finish, click on this button to start your search process.
New Category Button. Click on this button to create a new category, when you click on this button, there's a modal will appear, which will be containing multiple fields, let's explain each one:
- Title. Add your new category title.
- Description. Add your new category description.
- Thumbnail. Set your new category thumbnail.
- Active.Check to set your new category status as Active, or uncheck it to set your new category status as Inactive.
Create Category Button. Click on this button after you finish filling in your new category information to create your category.
New Product Button. Click on this button to add a new product to your store, when you click on this button there's a modal will appear, which will be containing four tabs, which are General Info tab, View tab, Images tab, and Order Fields tab, let's explain each tab:
General Info Tab. This is the first tab in this modal, you'll find multiple fields and options in this tab, let's explain each one:
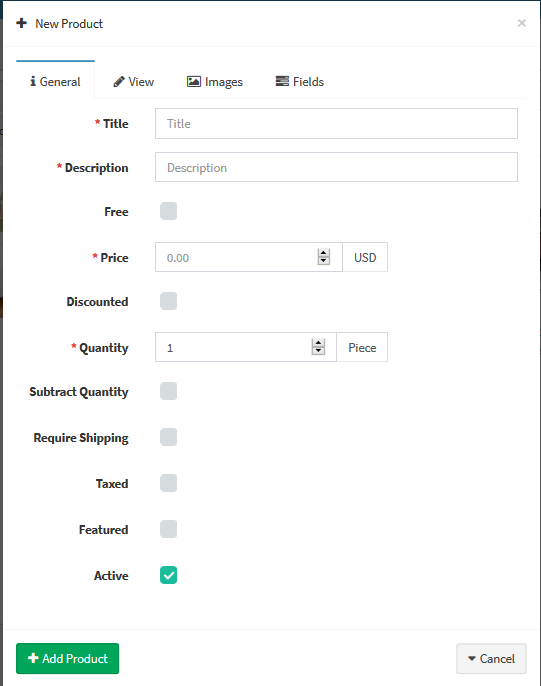
- Title. Add your new product title, notice that the title helps your clients to easily reach your product so type it carefully.
- Description. Add your new product description, also the description play an important role in the search process, and helps your clients to easily reach your product.
- Free. Check this if you want to set this product as a free product, uncheck it if your want to set this product as a purchased product.
- Price. Set your new product price.
- Discounted. Check this if you want to make a discount for this product, uncheck it if you don't want to make a discount for this product, when you check this option, there's a field will appear which is Price Old field, this field is the place to add your old price to make your discount for this product.
- Quantity. Set your inventory quantity for this product.
- Subtract Quantity.Check this if you want the quantity number decrease with every buying process for this product, uncheck it if you want the quantity number to be a static number.
- Require Shipping Button. Check this if your new product is a shippable product, uncheck it if your new product is a not shippable product, when you check it, there're a field and an options will appear, which are Rate Group Field, this field is a select options to choose the shipping rate group for this product, and the second option that appeared is Shipping Separately Option, check this option if you want this product to shipped separately, uncheck it if you want this product to shipped with other products as a normal case.
- Taxed. Check this if you want to add taxes to this product, when you check this option, there's a field will appear, which is Tax Class Field, this is a select options to choose this product's tax class.
- Featured. You can check this if you want to set this product as a featured item.
- Active. Check this if you want to set this product status as Active, uncheck it if you want to set this product status as Inactive.
View Tab. This is the second tab in this modal, you'll find three fields in this tab, let's explain each one:
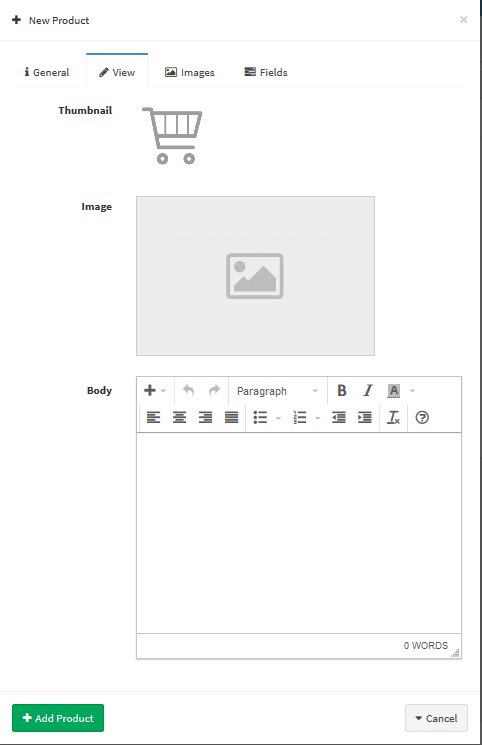
- Thumbnail. Upload your new product thumbnail.
- Image. Upload your new product images, this is the main image that appears in your shop page.
- Body. Add your new product full description, and you'll find all the formatting tools that you'll need in the top of the body square.
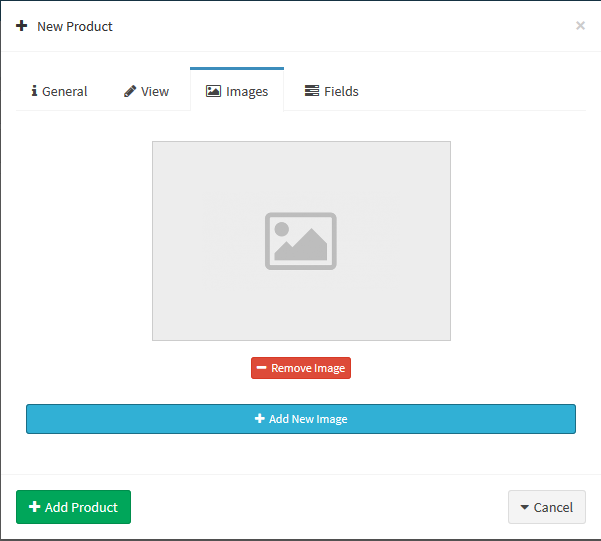
Images Tab. Here you can upload more product's image if you want, you'll find in this tab one button which is Add New Image Button, click on this button to upload your additional images.
Order Fields. Also you can add additional order fields to your new product, you'll find one button in this tab which is Add New Field Button, click on this button to add new order field, when you click on this button there're four fields will appear, let's explain each one:
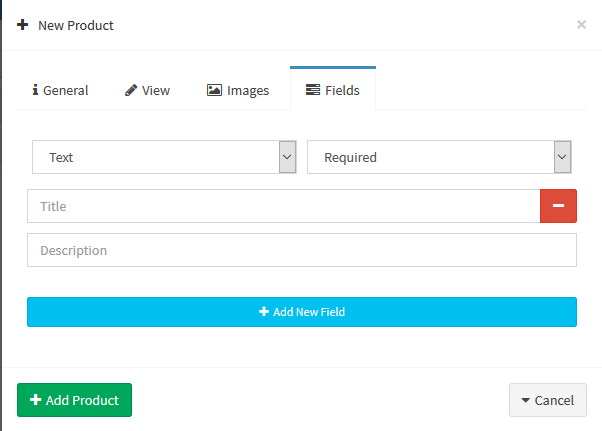
- Field Type. Choose your new order fields type, you'll find multiple options to choose from, such as Text, Number, Checkbox, Text area, and select.
- Field Status. Choose your new order field status, choose from Required or Optional.
- Title. Add your new order field title.
- Description. Add your new order field description.
Add Product Button. After you finish filling in your product information, click on this button to add this new product to your store.
