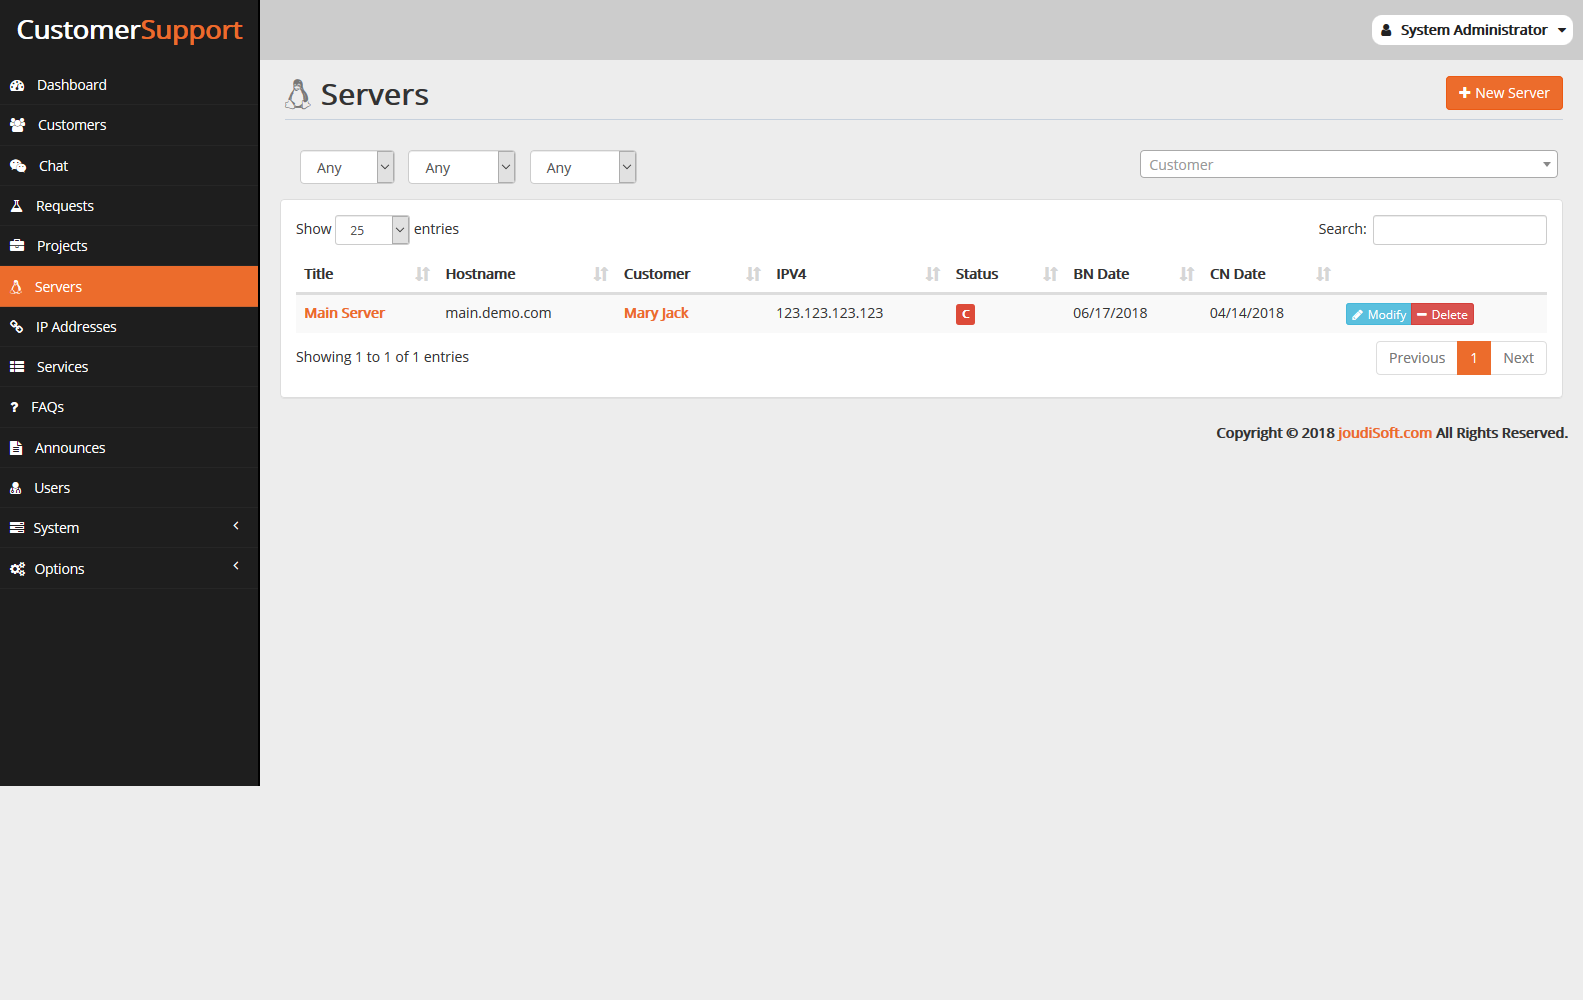
The Servers page is where to add, manage, and control your customers' servers. You'll see in this page two sections, are Add New Server section and the already added servers table, let's explain each one of them:

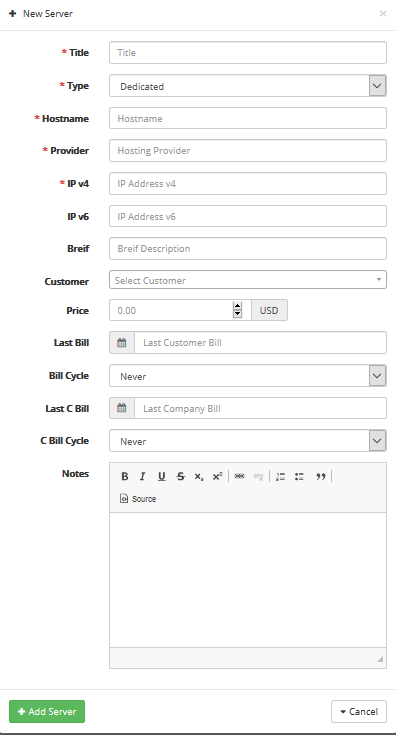
- New Server button. Click on this button to add a new server, when you click on this button there's a modal will appear, let's explain each part of this modal:
- Title. Add your server name title.
- Type. Choose the type of your server, you'll see multiple options, for example, Dedicated, VPS, RDP and Shared.
- Hostname. Add this server host name.
- Provider. Add your provider name.
- v4. Add your IP v4 Address for this server.
- IP v6. Add your IP v6 Address for this server, this is an optional field.
- Brief. Add a brief description for this server if you want to do that.
- Customer. Select your customer for this server.
- Price. Add the price of this server.
- Last Bill. Add this server last bill date.
- Bill Cycle. Define the bill cycle which is the duration of the service.
- C Bill. Add this company last bill date.
- C Bill Cycle. Define the bill cycle which is the duration of the service..
- Notes. Add your notes about this service, server or customer.

- Servers Table. Which contains Some informations about servers you have such as Title of the server, Hostname, Customer name(who owns the servers), IPV4, Status(C for company ,B for Customer server) if the server's status is B and C means that the company server is used by a customer, BN Date(Bill Date).
- Filters. you can filter your already added servers by the due status or undue.
- Servers. In this table you'll see the already added servers table, beside every server you'll find two buttons which are modify and delete, Click on modify button to edit any server information, and click on delete button to delete any server from your data.
