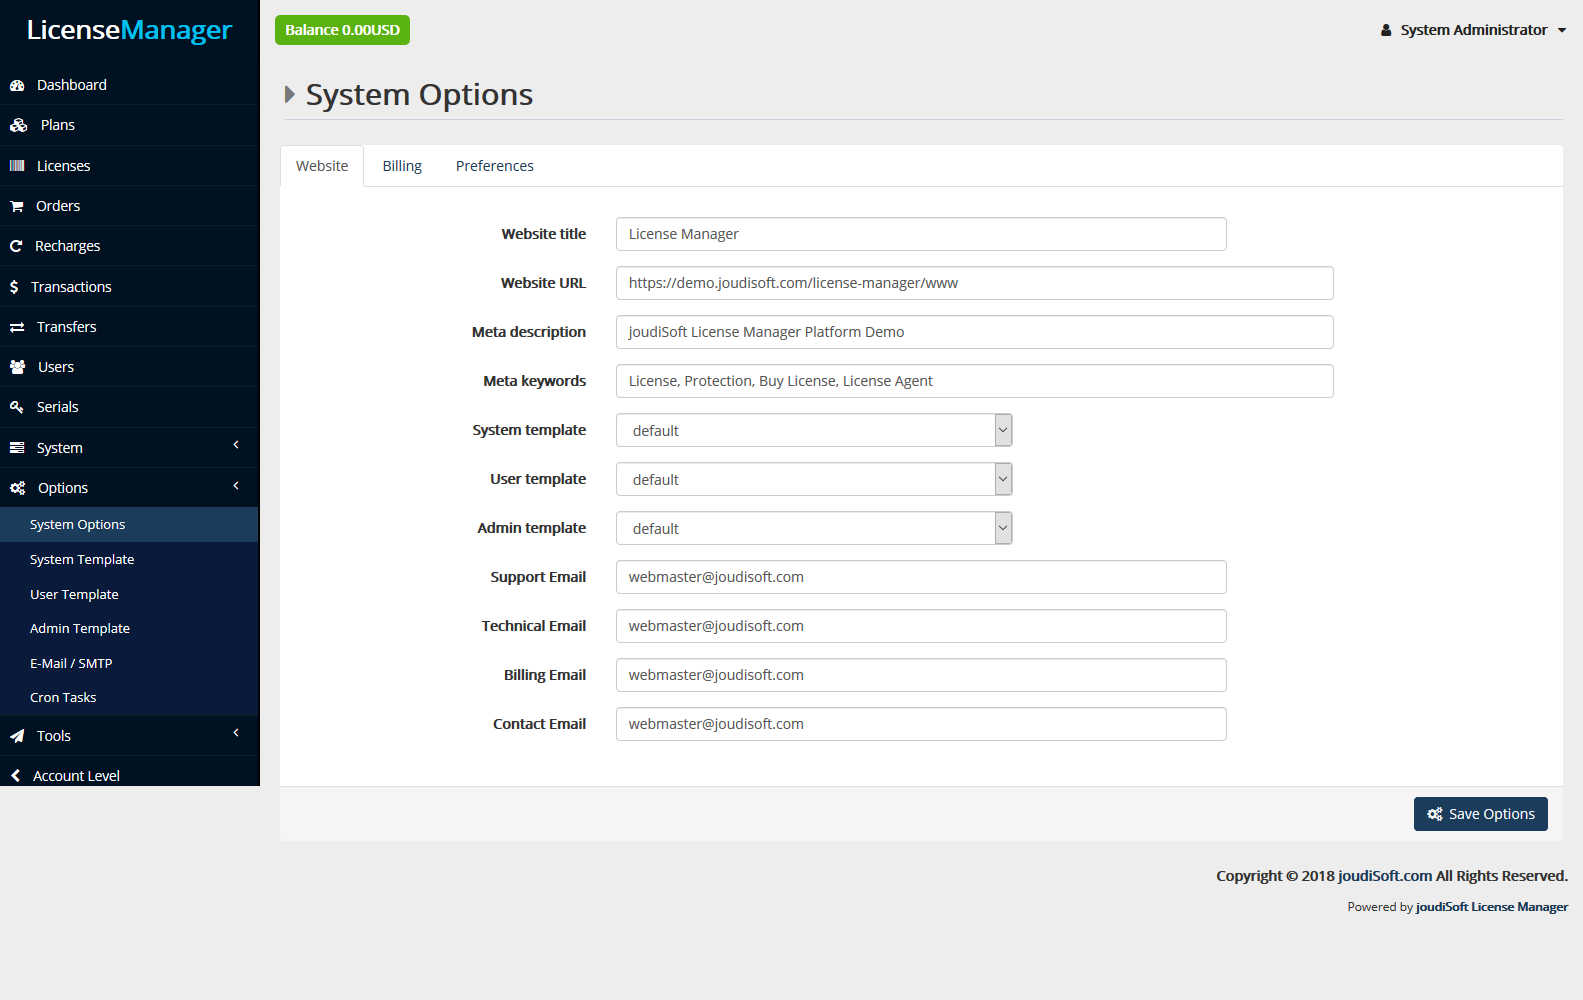
System options page enable you to manage your system and setup your system options, You can setup your website options, billing options and preferences options through this page. Let's explain each part of this page and how to do this.

Start by filling up your website information:
- Website Title. Website title is usually at the top of the page, and also may be at the very top of your browser. The document title only refers to one part or page of a website - for example the "joudiSoft - cloud computing, hosting services" title on joudiSoft website.
- Website URL. The url of your website. Remember to include the 'http:' in the beginning and a '/' at the end.
- Meta Description. A tag providing a metadata description for your website. Meta tags are seen by search engines.
- Meta keywords. Keywords that you must define in order to have your site referenced by search engines. You can enter several of them, separated by commas, as well as expressions, which must be indicated in quotation marks. For example, License, Protection, Buy License, License Agent.
- System Template. The system template is the software main interface, from this tab you can choose from the made ready templates.
- User Template. The user template is the software user interface, from this tab you can choose from the made ready templates.
- Admin Template. The system template is the admin interface, from this tab you can choose from the made ready templates.
- Support Email. Support email is appeard when someone visits contact us section and chose to contact your support team, so add the support team email here to let your customers reach you easily.
- Technical Email. Technical email is appeard when someone visits contact us section and chose to contact your technical team, so add the technical team email here to let your customers reach you easily.
- Billing Email. Billing email is appeard when someone visits contact us section and chose to contact your billing team, so add the billing team email here to let your customers reach you easily.
- Contact Email. Contact email is appeard when someone visits contact us section and chose to contact your contact team, so add the contact team email here to let your customers reach you easily.
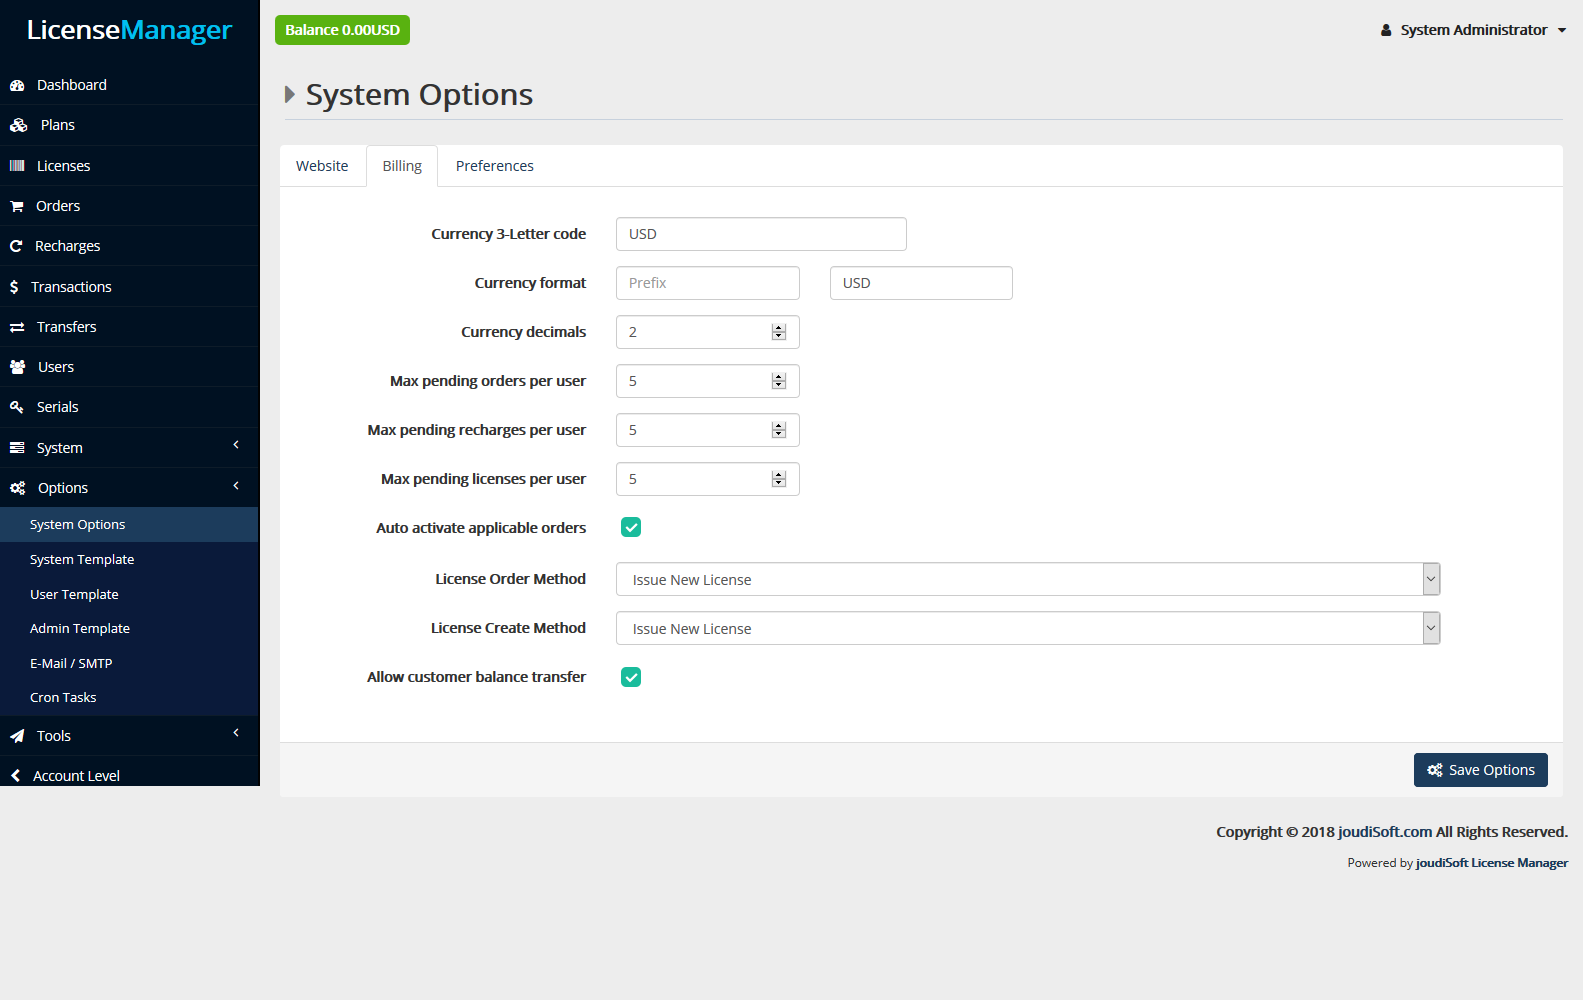
System Options / Billing

Billing tab is the place that you filling up all of your billing information and options, you'll find in this page many input fields, let's explain each one of them:
- Currency 3-Letter Code. Currency 3-letter code for your website, which appear in your system interface and the invoices, like USD, EUR and GBP.
- Currency Format. Currency Prefix, like $ for USD and € for EUR.
- Currency Decimals. The number of the decimal numbers which appears in the currency format, something like 34.87$ if you put 2 currency decimals.
- Max Pending Orders Per User. Define the number of the max pending orders per user, that will limit the amount of the pending orders per customer.
- Max Pending Recharges Per User. Define the number of the max pending recharges per user, that will limit the amount of the pending recharges per customer.
- Max Pending Licenses Per User. Define the number of the max pending licenses per user, that will limit the amount of the pending licenses per customer.
- Auto Activate Applicable Orders. Automatic activation for the applicable orders, which means that when a customer make an (applicable) order then successfully purchased it then the order activated automatically.
-
License Order Method. You have four options for Licenses Ordering System. Let's explain each one of them:
- Issue New License. This is the default License ordering method, in this case you'll issue a new license (Key) in the all situations.
- Get Non User Active License. This method allows you issue a Non User Active License (This means a license which issued from an admin level account and non used from any user before) as a new license for user usage.
- Convert Serial To Lisense. This method allows you issue a License from your created-before Serials, so you can add your created (not automatically generated) Serials then convert any Serial to a new issued License.
- Re-Issue Expired License. This method allows you re-issue the expired Licenses, in this case you'll not change your clients Licenses after each expiration, you'll just re-issue the License.
- Allow Customers Balance Transfer. This option allows customers to transfer balance to each other.
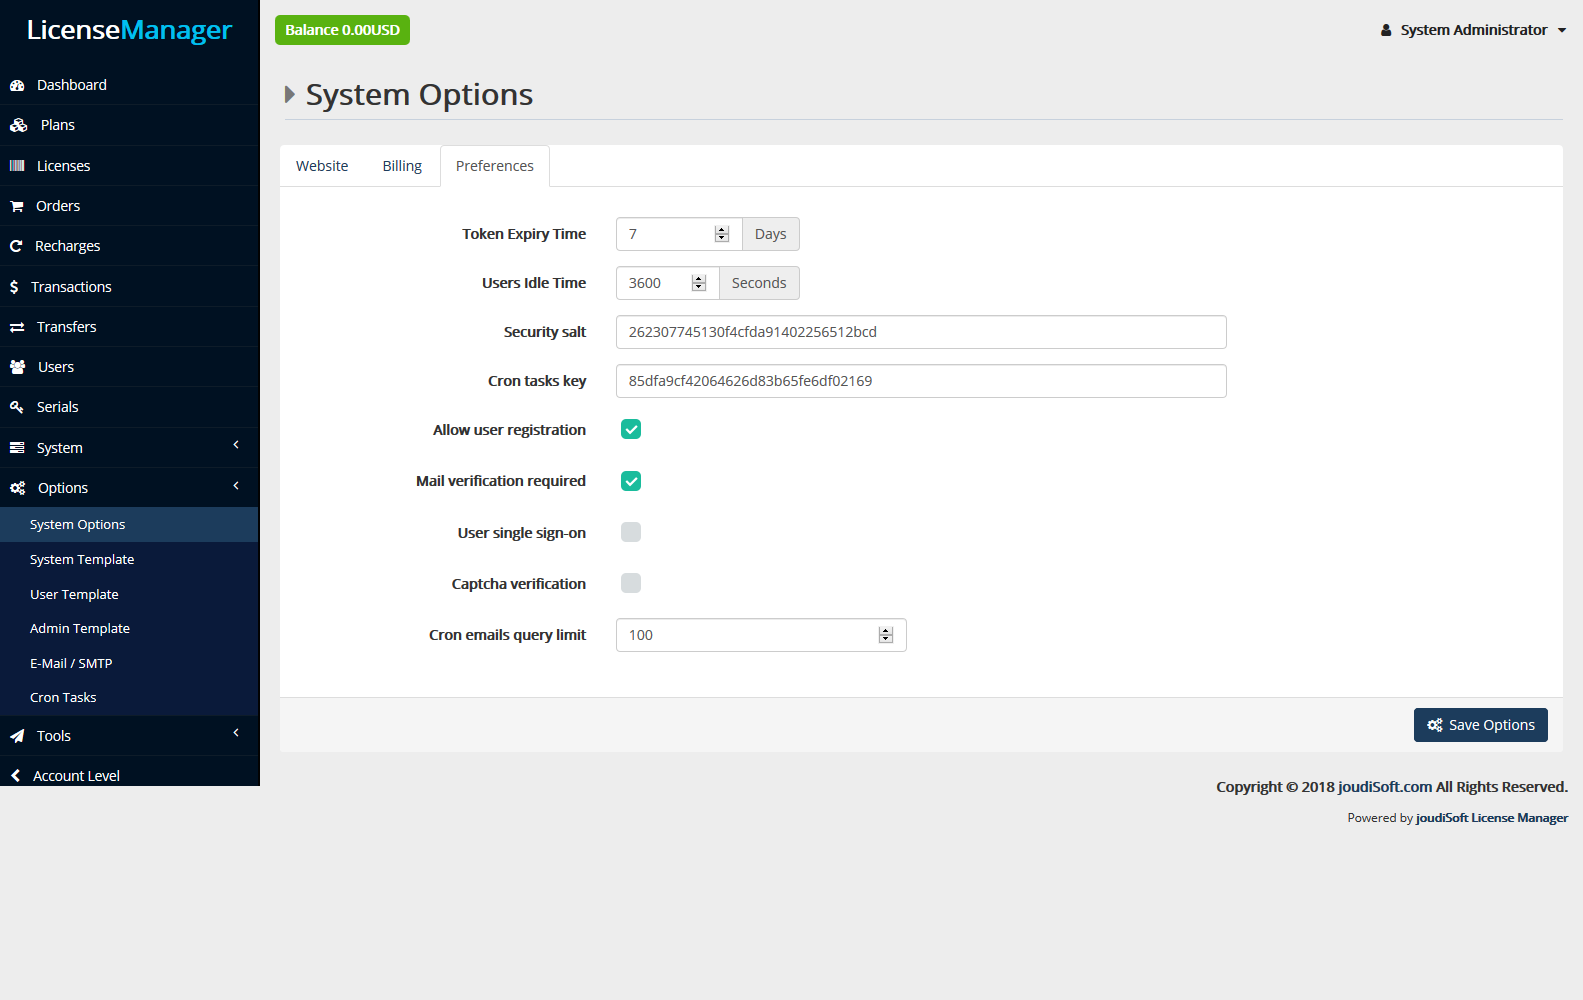
System Options / Preferences

Preferences tab is the place that you filling up all of your preferences options, you'll find in this page many input fields, let's explain each one of them:
- Token Expiry Time.
- Users Idle Time. The user idle time, which is the time that our tracking tool track the last seen users on the site then send this time to the server after the time you set.
- Security Salt. Security Salt code which is an 32 random characters.
- Cron Tasks Key. Cron Tasks key which is an 32 random characters.
- Allow User Registration. Allow or don't allow users to register on your system. You have the option here to make your clients register on your system or no.
- Mail Verification Required. This option makes the mail verification required or not required for the new register users.
- User single sign-on. This option makes the single sign-on acceptable or no on your system.
- Captcha Verification. You can make the captcha verification required or no, when you check it, there are two inputs fields will appear, which are captcha site key and captcha server key, to fill up with your captcha keys.
- Cron emails query limit. When you send a bulk mail for many users, here you define to the system how many emails send per time from the server, For example, if you send a bulk mail for 100,000 user, if you define the Cron emails query limit as a 100, then the server will send the bulk mail to 100 by 100 until finishing the 100,000 email.
